Have you ever thought about whether you can record a laptop screen without an application? Like in Windows 10, we can use Win + G short keys to start recording the screen without using an application.
But in this post, I will discuss how to record a laptop screen online without downloading an application, and of course, this online service is completely free. The name of the website that has this online screen recording tool is the RecordCast screen recorder.
How to Record Laptop Screen Online
It’s pretty easy to finish a recording using this web tool. Let’s check the detailed steps below.
Step 1: Open the Website
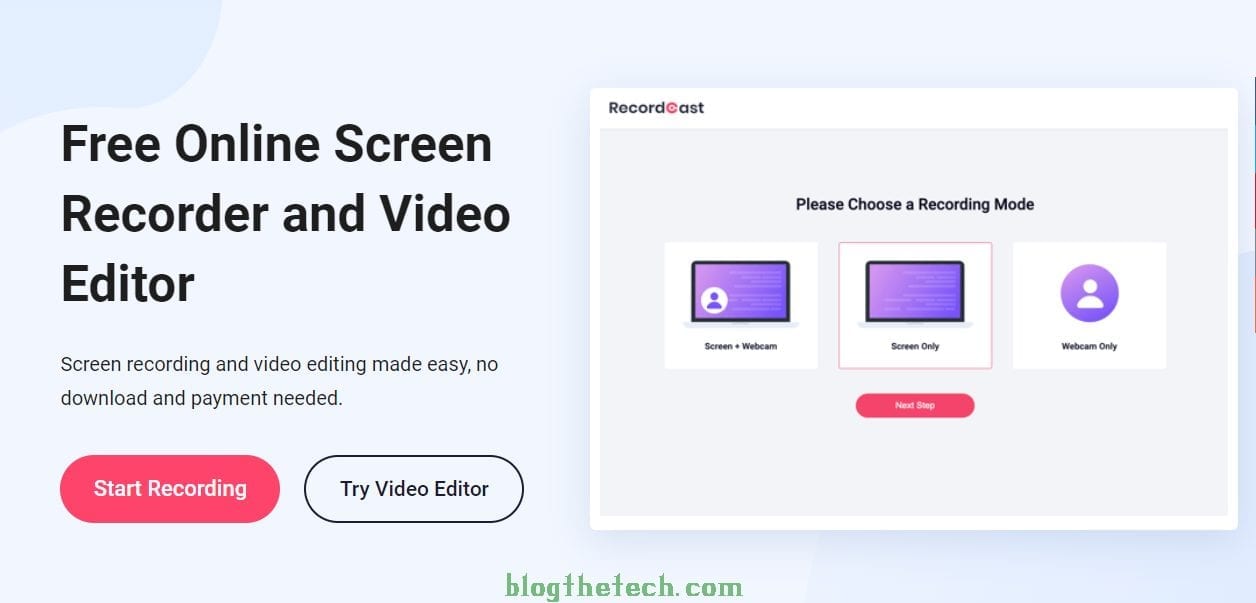
Because this is online and only uses the browser function, you can go to the RecordCast.com site or just click the link to start recording your laptop or computer screen. Then after the web opens, click the Start Recording button.
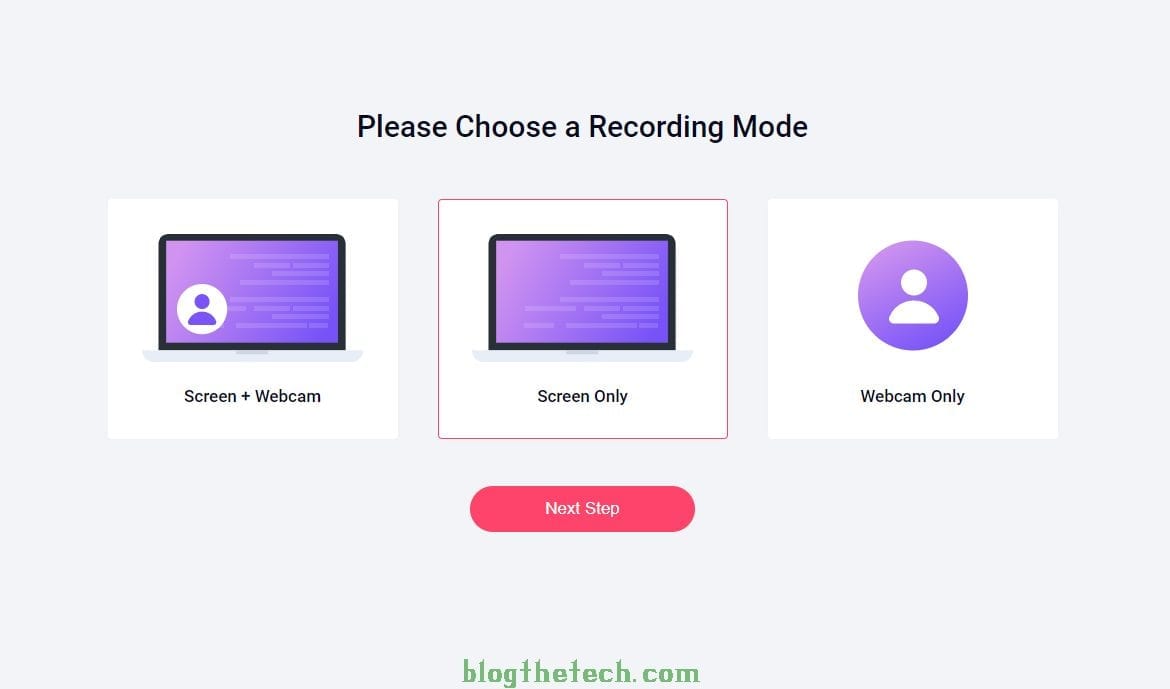
Step 2: Start Recording
Another page will open. You can choose a mode to start recording your laptop or computer screen: Screen +Webcam, Screen Only, Webcam Only.
Next, choose an audio method. There are three audio methods, namely Microphone + System Audio, Microphone, System Audio, and No Audio, which have the following functions:
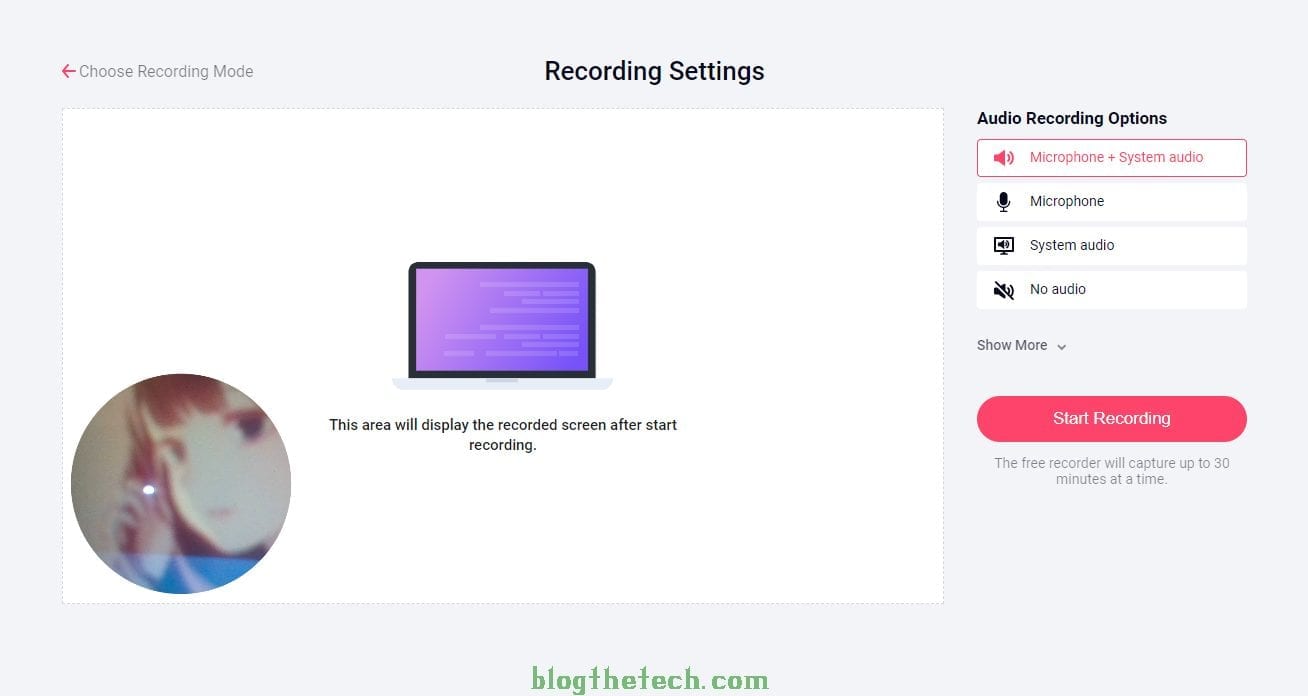
- Microphone + System Audio feature can record audios from yourself and the system audio simultaneously. It’s good to make an explanation.
- The Microphone function is to record the screen by recording sound through a laptop or computer microphone. This function is suitable if you want to create video presentations and tutorials.
- System Audio functions to record the screen as well as record live system sounds. So if you play a game, the audio from the game will automatically be recorded 100% with clear results.
- No Audio allows you to record your laptop or computer screen without sound.
Step 3: Choose an Area
After clicking the recording button at the previous stage, a pop up will appear where you will determine which part of the screen will be recorded. There are three different tabs here, including:
- The Your Entire Screen tab will record all parts of your laptop or computer screen.
- The Application Window tab will record the windows of certain programs running on your laptop or computer.
- The Chrome Tab will record the screen on any tab open in your favorite Chrome browser.
If you are familiar with the function of each tab that I described above, don’t forget to check the Share Audio so that later the sound can be recorded through browser permissions along with your laptop or computer screen. If you have selected which screen and tick Share Audio, please click Share to start recording the screen.

Step 4: Stop Recording
After clicking the Share button in the previous step, it will automatically start recording your laptop or computer screen. To end the screen recording, click the stop button.
Step 5: Recording Is Finished
If you have clicked the stop button, a page display will automatically appear where you can download the video recorded by the screen or continue editing the video.
To re-record, click the Re-record button. If you want to download the video directly, click Download. However, if you want to continue editing the video, click the “Edit This Screencast Now” button at the bottom right.

How to Edit Screencast Videos
If you pay close attention, the video editor that is owned by RecordCast is powerful, like many other desktop applications such as the Wondershare Filmora application on the PC platform. However, the video editor from RecordCast is simpler and very suitable for use by beginners and does not take up much memory.
Step 1. Upload Media
The System Audio feature and lightweight video editor are, in my opinion, the best of RecordCast. What’s more, the webcam feature is also available. When you upload your media like photos, videos, audios into RecordCast, you can also find this webcam feature under the Record option.

Here you can continue recording your computer screen like the former steps I discussed. Or you can use its Webcam feature to take a photo or record yourself with a presentation in the video. Then use it in your final video.
Step 2. Customize Recordings
Then add some text captions to explain what your screen video is. Tell your visitors what you want to convey. RecorrdCast video editor allows you to add simple text and dynamic text to your final video. You can adjust the text font, color, size, style, alignment, effect, etc. to make the text more beautiful in the video.
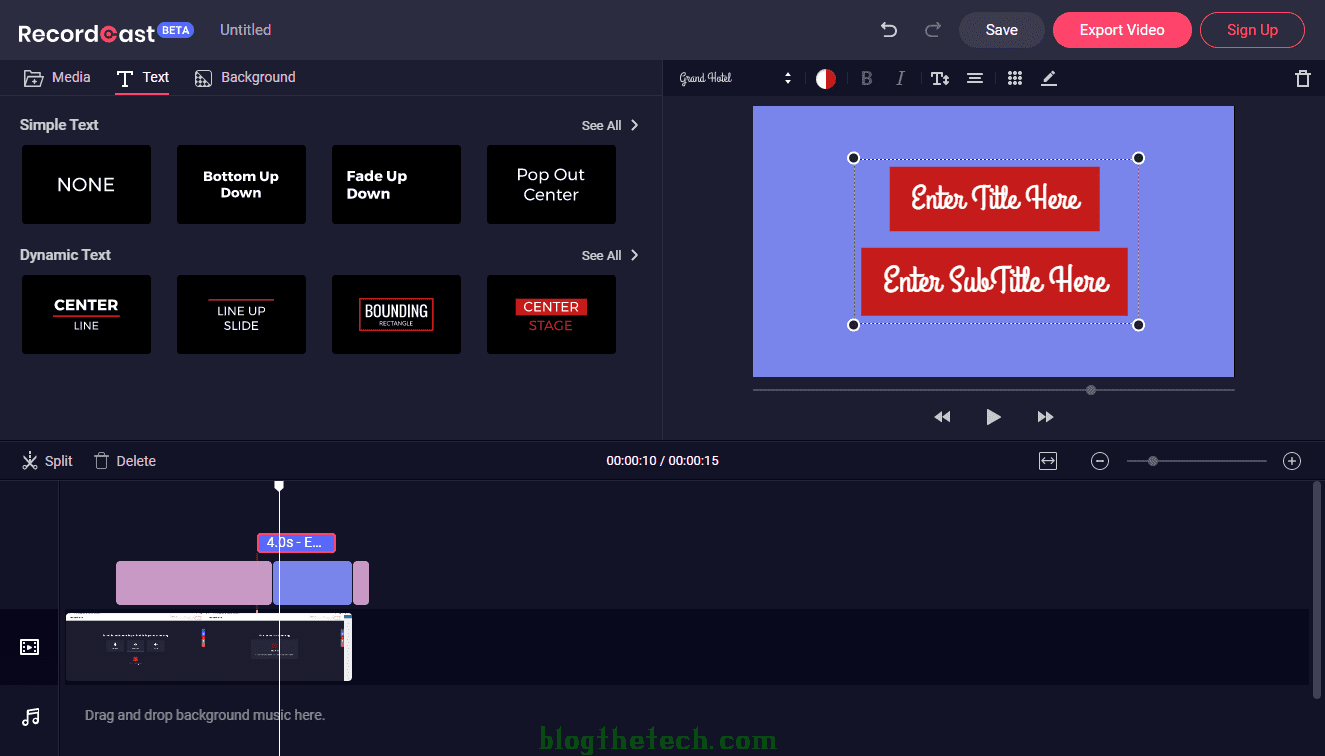
You can also split your recording into different clips and insert background audios to each clip. Suppose you want to add a background to the video. Check it out to use the feature that meets your needs.
Step 3. Export Video
You can see there is a Save button at the top of RecordCast, which allows you to save your video under your account for further editing. However, to protect the users’ privacy, RecordCast saves your video resources to your local computer. So in case you want to continue editing your video project next time, just make sure you don’t delete the video resources.
Alternatively, export it directly to your computer with MP4format. You can rename the video and choose a video quality from 480p, 720p, 1080p.
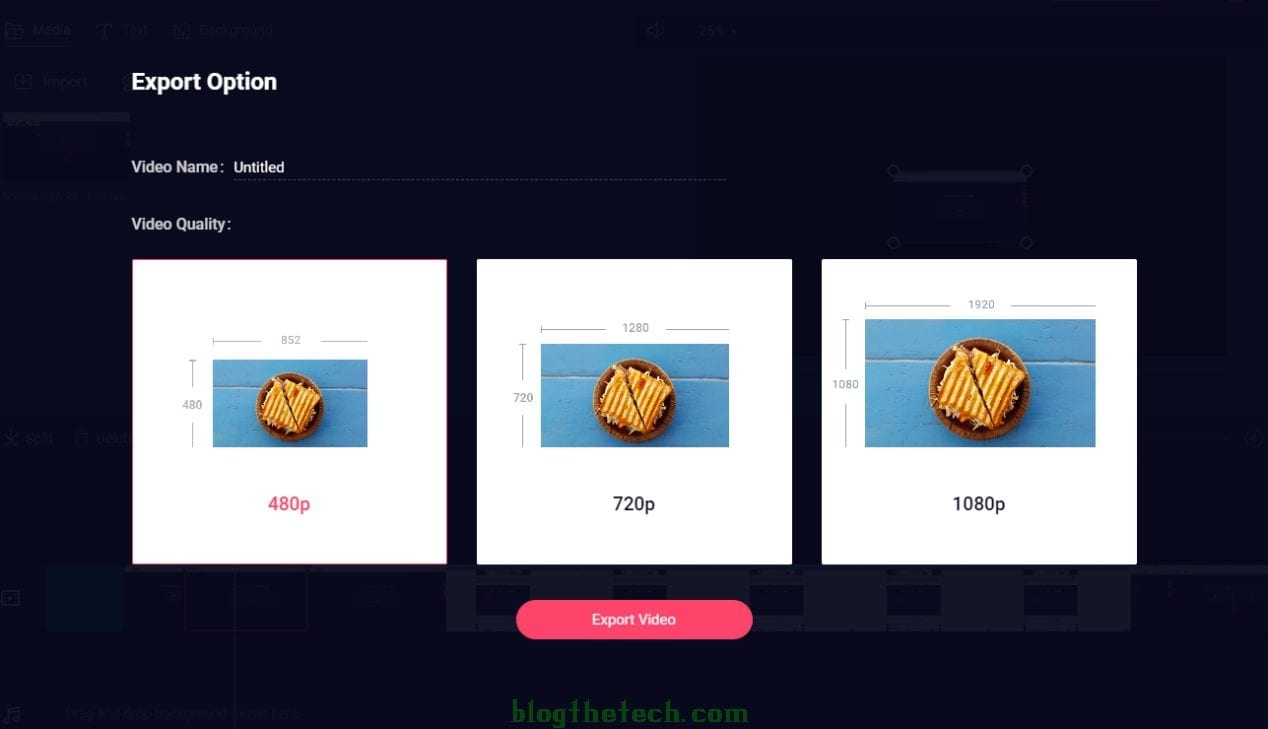
All of those are free, and no watermark on the output video. This is why I share it with you all in this article. It’s pretty practical.
For those who are lazy to download screencast and video editor applications because it is burdensome for laptop or computer memory, RecordCast can be the best solution for you. That’s enough tutorial for how to record a laptop screen online.